So, you've just bought yourself a shiny new STIHL FSA 60 R trimmer, and now you're wondering how the heck you're supposed to replace that string when it inevitably wears out. Don’t sweat it! Replacing the string on your STIHL FSA 60 R is actually way easier than it looks. This guide is here to walk you through every step, so you can keep your lawn looking as sharp as your new power tool. Whether you're a seasoned pro or a complete newbie, this article’s got you covered.
Let's be real, nobody wants to deal with a broken trimmer string in the middle of a yard cleanup, right? That’s why understanding how to replace the string on your STIHL FSA 60 R is crucial if you want to maintain your landscaping game. We’ll break down everything from the tools you’ll need to the exact steps to follow, all while keeping it simple and straightforward.
Now, buckle up because we’re diving deep into the world of STIHL FSA 60 R string replacement. By the end of this, you’ll feel like a DIY expert ready to tackle any trimming challenge that comes your way. Let’s get started!
Understanding the STIHL FSA 60 R
What Makes the STIHL FSA 60 R Special?
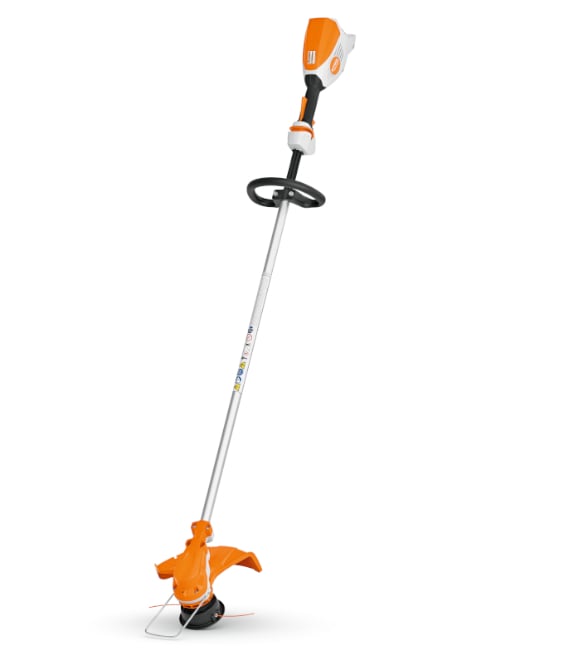
First things first, let’s talk about why the STIHL FSA 60 R is such a game-changer in the world of lawn care. This battery-powered trimmer is designed for efficiency and ease of use, making it perfect for homeowners and professionals alike. With its lightweight design and powerful motor, the FSA 60 R is built to handle even the toughest trimming jobs.
One of the standout features of the FSA 60 R is its automatic spool system. This system ensures that the string is fed out as needed, reducing the hassle of manual adjustments. However, even with this advanced feature, there will come a time when you need to replace the string entirely. And that’s exactly what we’re here to help you with.
When Should You Replace the String?
Knowing when to replace the string on your STIHL FSA 60 R is key to maintaining its performance. Over time, the string will wear down due to regular use, and you might notice it becoming frayed or snapping more frequently. If you start to see these signs, it’s a good indicator that it’s time for a replacement.
Another red flag is if your trimmer isn’t cutting as effectively as it used to. This could mean the string has become too short or is no longer feeding out properly. Don’t wait until it’s too late—regular maintenance will keep your FSA 60 R running smoothly for years to come.
Gathering Your Tools
What You'll Need to Replace the String
Before you dive into the replacement process, make sure you have all the necessary tools on hand. Here’s a quick list of what you’ll need:
- STIHL FSA 60 R Trimmer
- New trimmer line (compatible with your model)
- Spool removal tool (if not included with your trimmer)
- Tweezers (optional, but helpful)
- Scissors or a knife
Having these tools ready will make the process smoother and faster. Trust me, nothing’s worse than realizing halfway through that you’re missing something essential.
Step-by-Step Guide to Replacing the String
Step 1: Turn Off and Disconnect
Safety first, folks! Before you start messing around with your trimmer, make sure it’s turned off and disconnected from the battery. You don’t want any accidental starts while you’re working on it.
Step 2: Remove the Spool Cover
Next, locate the spool cover at the bottom of your trimmer head. Depending on your model, you might need to press a button or turn the cover counterclockwise to remove it. Once it’s off, set it aside so you can access the spool inside.
Step 3: Take Out the Old Spool
Now it’s time to remove the old spool. You might need to use a spool removal tool or your fingers to unscrew it. Once it’s out, inspect it for any damage or wear. If the spool itself is in good condition, you can reuse it; otherwise, it’s a good idea to replace it with a new one.
Step 4: Prepare the New String
Cut a length of new trimmer line according to your model’s specifications. For the STIHL FSA 60 R, you’ll typically need around 10-12 feet of string. Thread one end of the string through the hole in the center of the spool, making sure it’s secure.
Step 5: Wind the String
This is where things can get a little tricky, but don’t worry—it’s easier than it sounds. Start winding the string around the spool in the direction indicated by the arrows on the spool. Make sure to keep the tension consistent as you wind, and avoid overlapping the string.
Step 6: Insert the String Ends
Once you’ve wound the string, insert the loose ends into the designated holes on the spool. Use tweezers if necessary to ensure they’re securely in place. This will help the string feed out smoothly when you’re using the trimmer.
Step 7: Reassemble the Trimmer
Now it’s time to put everything back together. Place the spool back into the trimmer head and secure it by screwing it back in place. Then, replace the spool cover and make sure it’s tightened properly. Finally, reconnect the battery and give your trimmer a test run to ensure everything’s working as it should.
Tips and Tricks for a Successful Replacement
Here are a few extra tips to help you master the art of STIHL FSA 60 R string replacement:
- Always use the recommended string diameter for your model to avoid performance issues.
- Keep extra spools and string on hand for quick replacements in the future.
- Regularly check the string tension to ensure optimal cutting performance.
- If you’re struggling with winding the string, try practicing on an empty spool first.
These tips might seem small, but they can make a big difference in the longevity and effectiveness of your trimmer.
Common Issues and Solutions
Why Won’t the String Feed Out?
One common issue users face is the string not feeding out properly. This can happen for a few reasons, such as incorrect winding or a jammed spool. To fix this, try unwinding the string and starting over, making sure to follow the winding direction closely. If the problem persists, it might be worth checking the spool for any obstructions or damage.
What If the String Keeps Breaking?
If you’re noticing that your string is breaking frequently, it could be due to using the wrong type of string or applying too much pressure while trimming. Make sure you’re using a high-quality string that’s compatible with your FSA 60 R, and try adjusting your trimming technique to reduce strain on the string.
Maintaining Your STIHL FSA 60 R
Regular maintenance is key to keeping your STIHL FSA 60 R in top condition. In addition to replacing the string as needed, make sure to clean the trimmer head and check for any signs of wear on other components. A well-maintained trimmer will not only perform better but will also last longer, saving you money in the long run.
Conclusion
Replacing the string on your STIHL FSA 60 R doesn’t have to be a daunting task. With the right tools and a bit of practice, you’ll be able to do it like a pro in no time. Remember to follow the steps carefully, keep an eye out for common issues, and don’t hesitate to reach out for help if you need it.
So, what are you waiting for? Grab your tools and get to work! And don’t forget to share your experience with us in the comments below. Whether you’re a seasoned DIYer or a first-timer, we’d love to hear about your trimming adventures. Happy trimming!
Table of Contents
- Stihl FSA 60 R String Replacement: A Beginner's Guide to Mastering Your Trimmer
- Understanding the STIHL FSA 60 R
- What Makes the STIHL FSA 60 R Special?
- When Should You Replace the String?
- Gathering Your Tools
- What You'll Need to Replace the String
- Step-by-Step Guide to Replacing the String
- Step 1: Turn Off and Disconnect
- Step 2: Remove the Spool Cover
- Step 3: Take Out the Old Spool
- Step 4: Prepare the New String
- Step 5: Wind the String
- Step 6: Insert the String Ends
- Step 7: Reassemble the Trimmer
- Tips and Tricks for a Successful Replacement
- Common Issues and Solutions
- Why Won’t the String Feed Out?
- What If the String Keeps Breaking?
- Maintaining Your STIHL FSA 60 R
- Conclusion